
Find out how to return to the default call list displaying all calls after applying a filter
Table of Contents
To use the filter tool in the Call List View - Explore the permissions Explore app and View AI models are required. If you need additional permissions contact your administrator.
1. Introduction
The Call List View in Explore presents a database of all calls that have been uploaded to the platform. The Filter tool allows you to select the attributes of the calls you would like to see in the call list and save the settings for future use. You are able to save multiple types of filter settings so you can always quickly and easily find the calls which are most important to you, whether it be for training and review purposes or for keeping up-to-date with changing local conditions.
When you have finished using a new or saved filter it is important to clear the filter settings to ensure the call list reverts back to displaying all calls. The filter tool in the Call List view gives you the option to remove a specific level of a multi-level filter or to reset all settings to default (displaying all calls).
2. Step-by-Step Guidance
- The Filter tool is accessible through the funnel icon button in the top right corner of the Call List View in Explore
- If a filter has been applied, the funnel icon will be colored blue. If a date filter has been applied the calendar icon will also be blue.
Note: It is not necessary to clear applied filters when switching between saved filters. Clearing filters is only required when you would like to return to the default call list.
Clearing a saved filter will not delete it from MY FILTERS
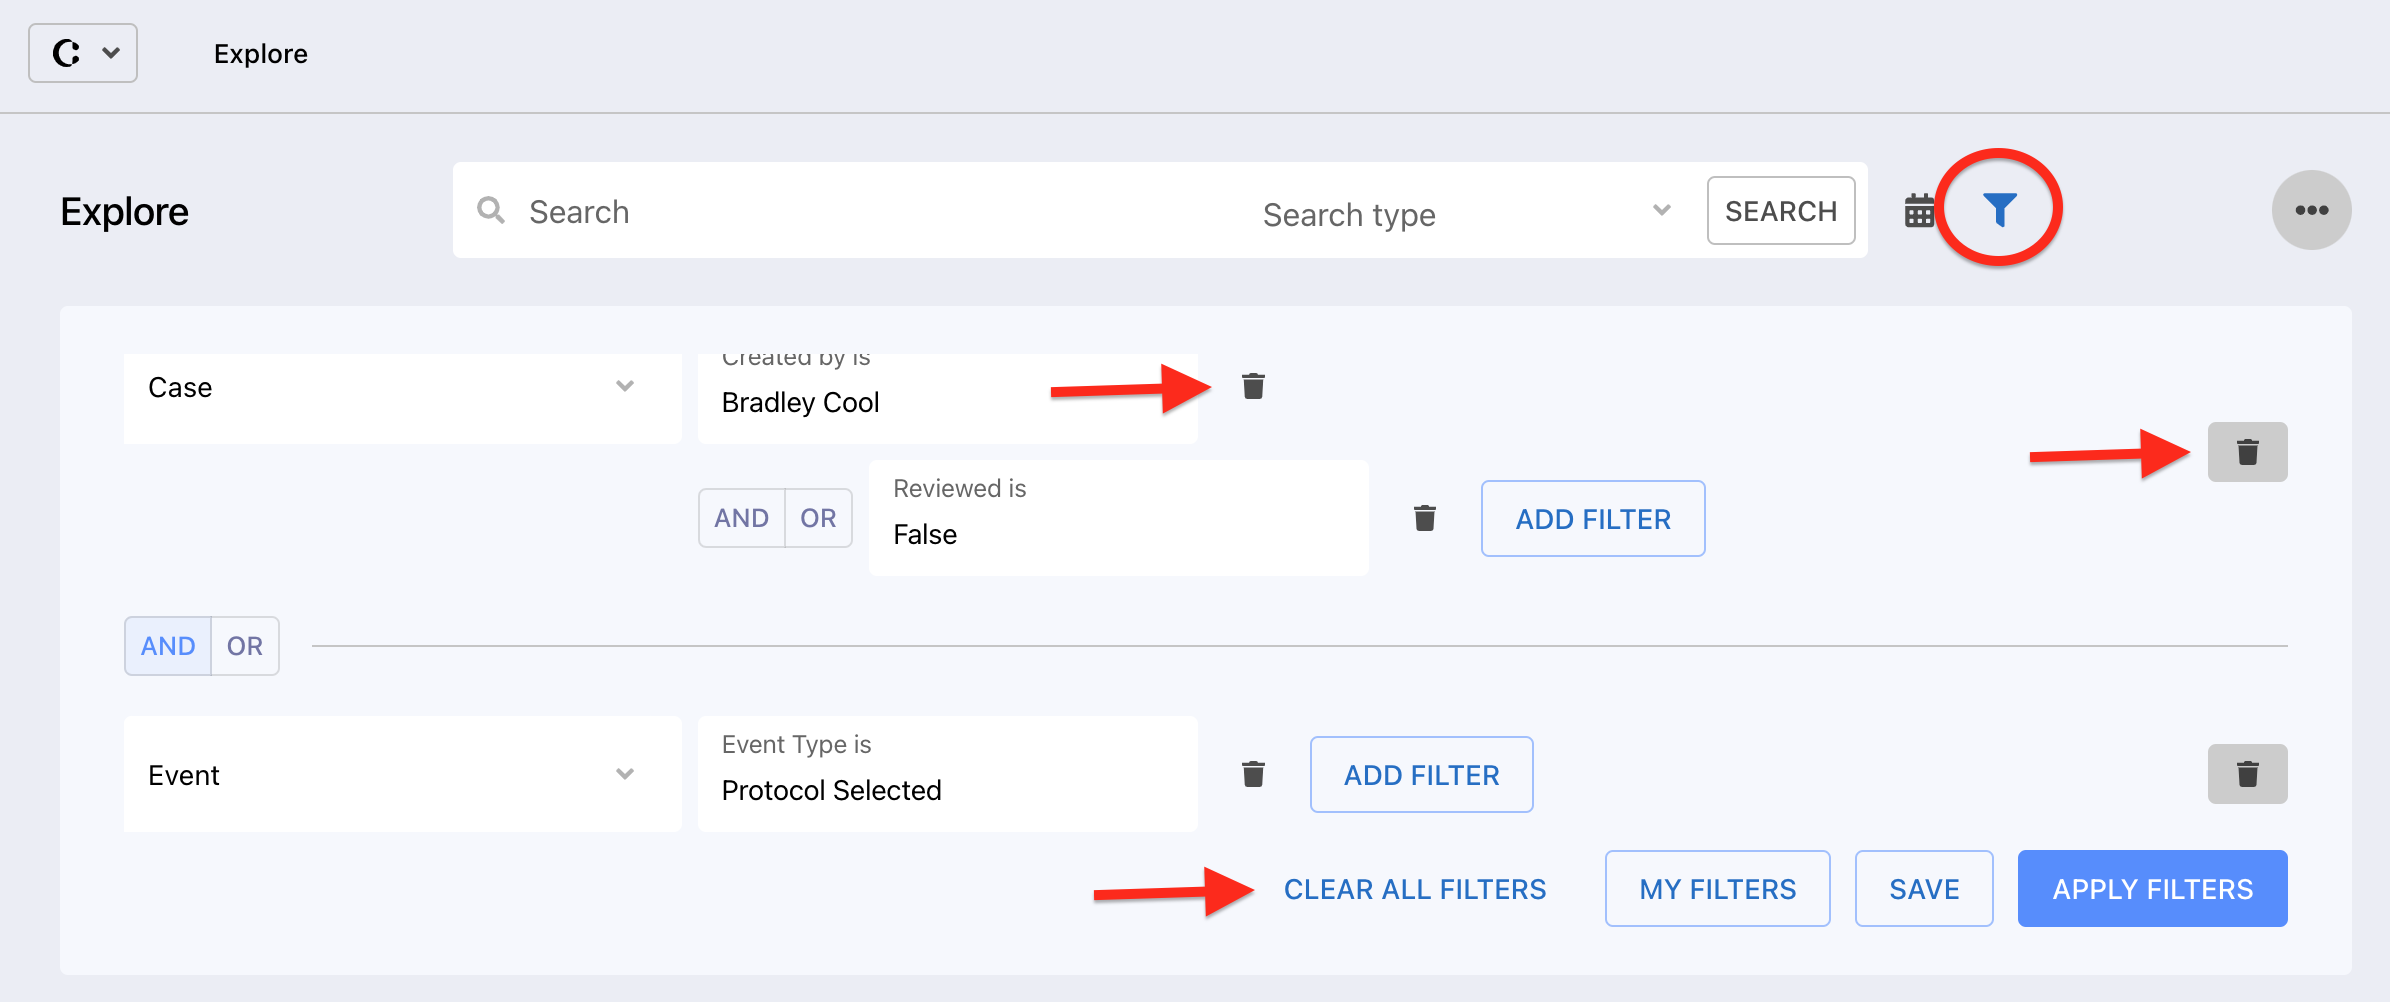
3. The funnel icon will open the filter drop-down window, giving multiple options to clear filters-
-
- If you would like to clear a single level of a multi-level filter, click the trash can icon next to the filter you would like to delete
- If you would like to clear a group of filters within a multi-level filter, click the trash can icon to the far right of the filter group
- If you would like to reset all filter settings, click CLEAR ALL FILTERS
4. Note: Clicking CLEAR ALL FILTERS will also clear any time and date settings you have applied.
5. If you have made new filter settings, click APPLY FILTERS. If you have cleared all filters the call list will automatically update. Click on the funnel icon to close the filter window and view the call list
Note: If you would like to view all calls, ensure the funnel and calendar icons are colored grey. Blue-colored icons denote a filter is in use. Navigating away from the filter menu or the Call List View will not reset filter settings.
3. Further Reading
How to customize the layout of the Call List View
How to export the Call List output
How to perform a quick search in the Call List View
How to apply new filters to your call list in the Call List View
How to apply saved filters to your call list in the Call List View
How to turn on notifications for high-priority calls