
Learn how to configure your protocol so that desired input is collected and displayed in specific location in your protocol flow
Table of Content
Step 1: Configure the collect of the desired input
Step 2: Configure the display of the collected input
Introduction
 Flow Value Collectors are a type of content block which can be used to populate your organization's protocol steps/view nodes.
The main purpose of Flow Value Collectors is to dynamically gather and display specific input which is entered in a protocol flow. Thus, Flow Value Collectors enable the addition of automated summaries or the sporadic reminder of previously collected information, in specific steps of your protocol flow.
Adding Flow Value Collectors to your triaging process requires access to the Protocol Editor Module. The flow value collector block is available in the Right Sidebar of the Single Node View.
Step-by-step guidance
Collecting and displaying information using flow value collectors is a 2-fold process. On one hand, you need to configure the collection of the desired information (Step 1). On the other hand, you also need to configure the display of the collected information, so they appear in their desired location (Step 2).
⚠️Configuring a flow-value collector requires the user to:
- Have access to the targeted protocol graph, in an editable version.
- Have two pieces of information at hand prior to following the steps listed below :
1. Which input should be collected from the protocol flow
2. Where in the protocol flow the collected input should be displayed
💡 When working with Flow Value Collectors for the first time, we recommend you start completing Step 2 before starting completing Step 1.
Step 1: Configure the collect of the desired input
 1. In your graph, identify a content block which requests an input you want to collect. This could for instance be a select, simple text or multiline text input content block in your protocol flow.
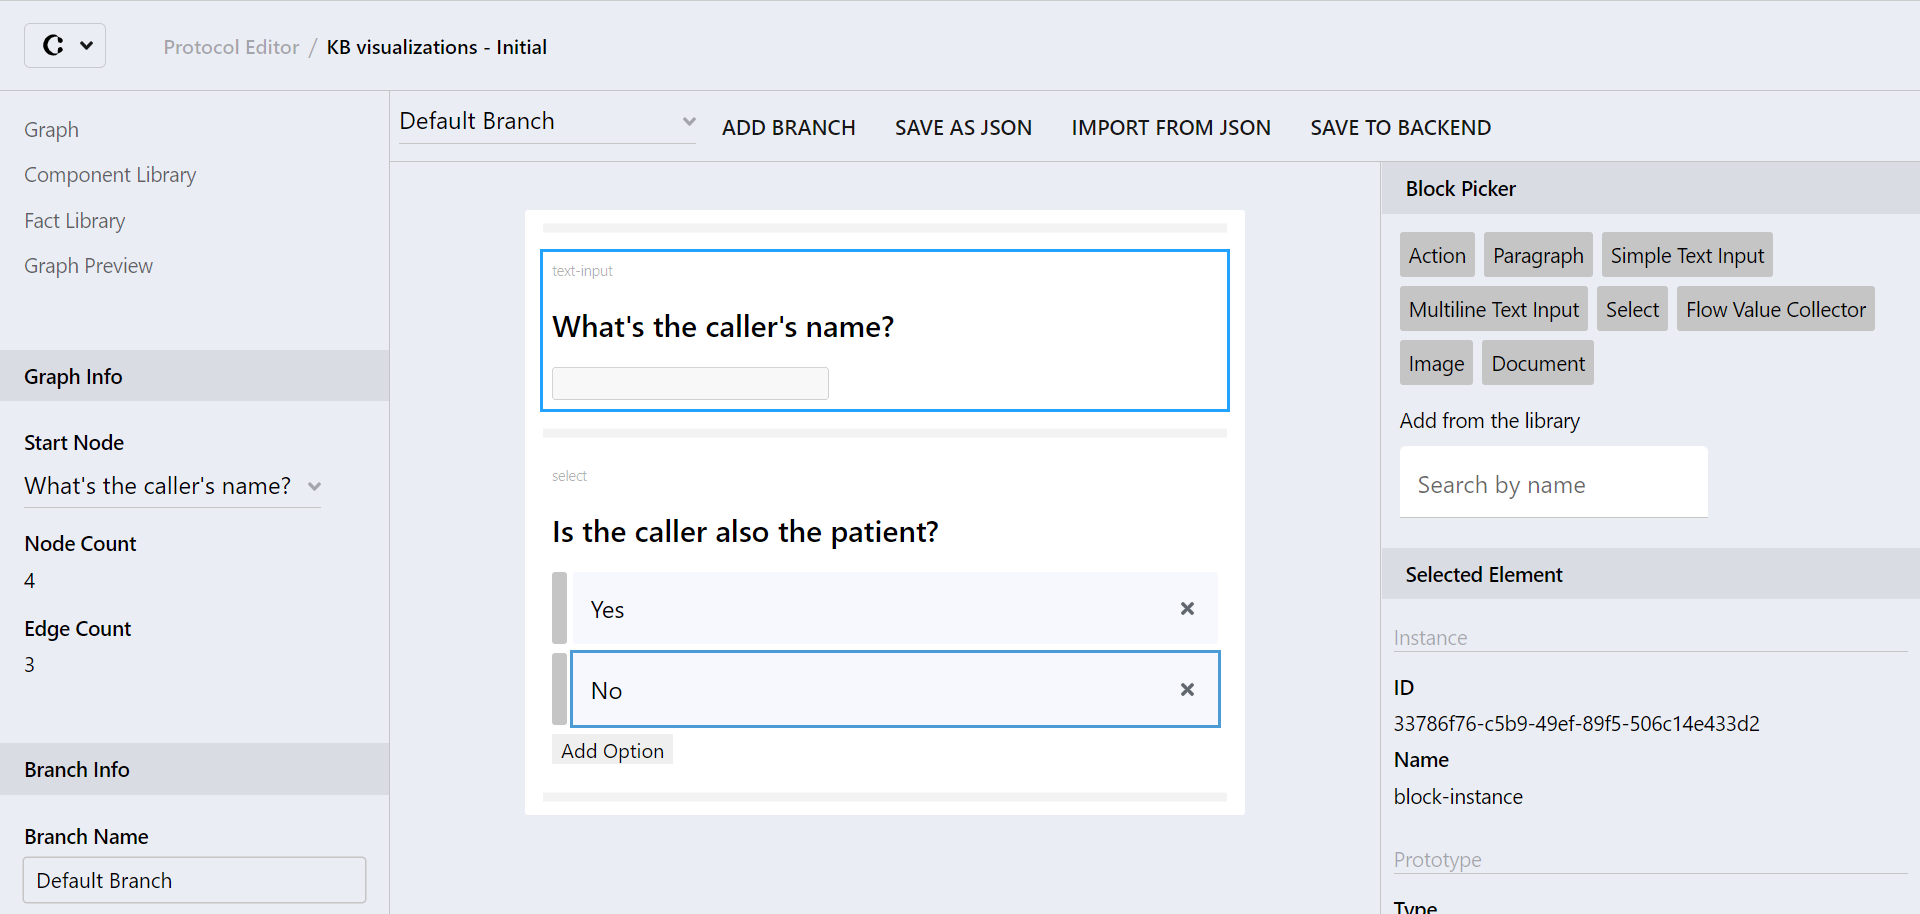
In this example, we want to collect the caller's name. We therefore focus on its corresponding simple text input block.
2. Select the concerned block by clicking on it the View Node Canvas. In the "Selected Element" section of the Right sidebar, click on "Add Attribute". Two empty "Key" and "Value" fields shall appear at the bottom of the Right Sidebar.
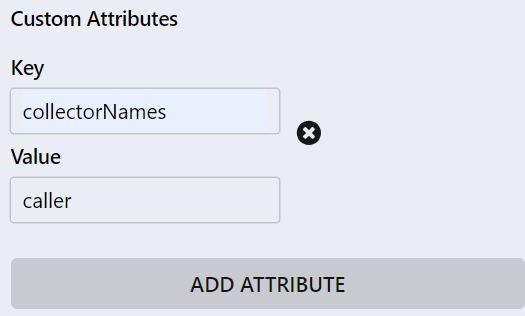 3. Configure your block by filling the key and value attribute fields:
- Value: the name of the flow value collector that should display the collected input
In our example, we want the caller's name to be collected and displayed by the flow value collector named "caller". We therefore write "caller" as value attribute.
4. Congratulations: You have configured your block so its input is now collected by the flow value collector you have referred to in the value field! You can now repeat this process for all blocks which are requesting input you want to collect.
Step 2: Configure the display of the collected input
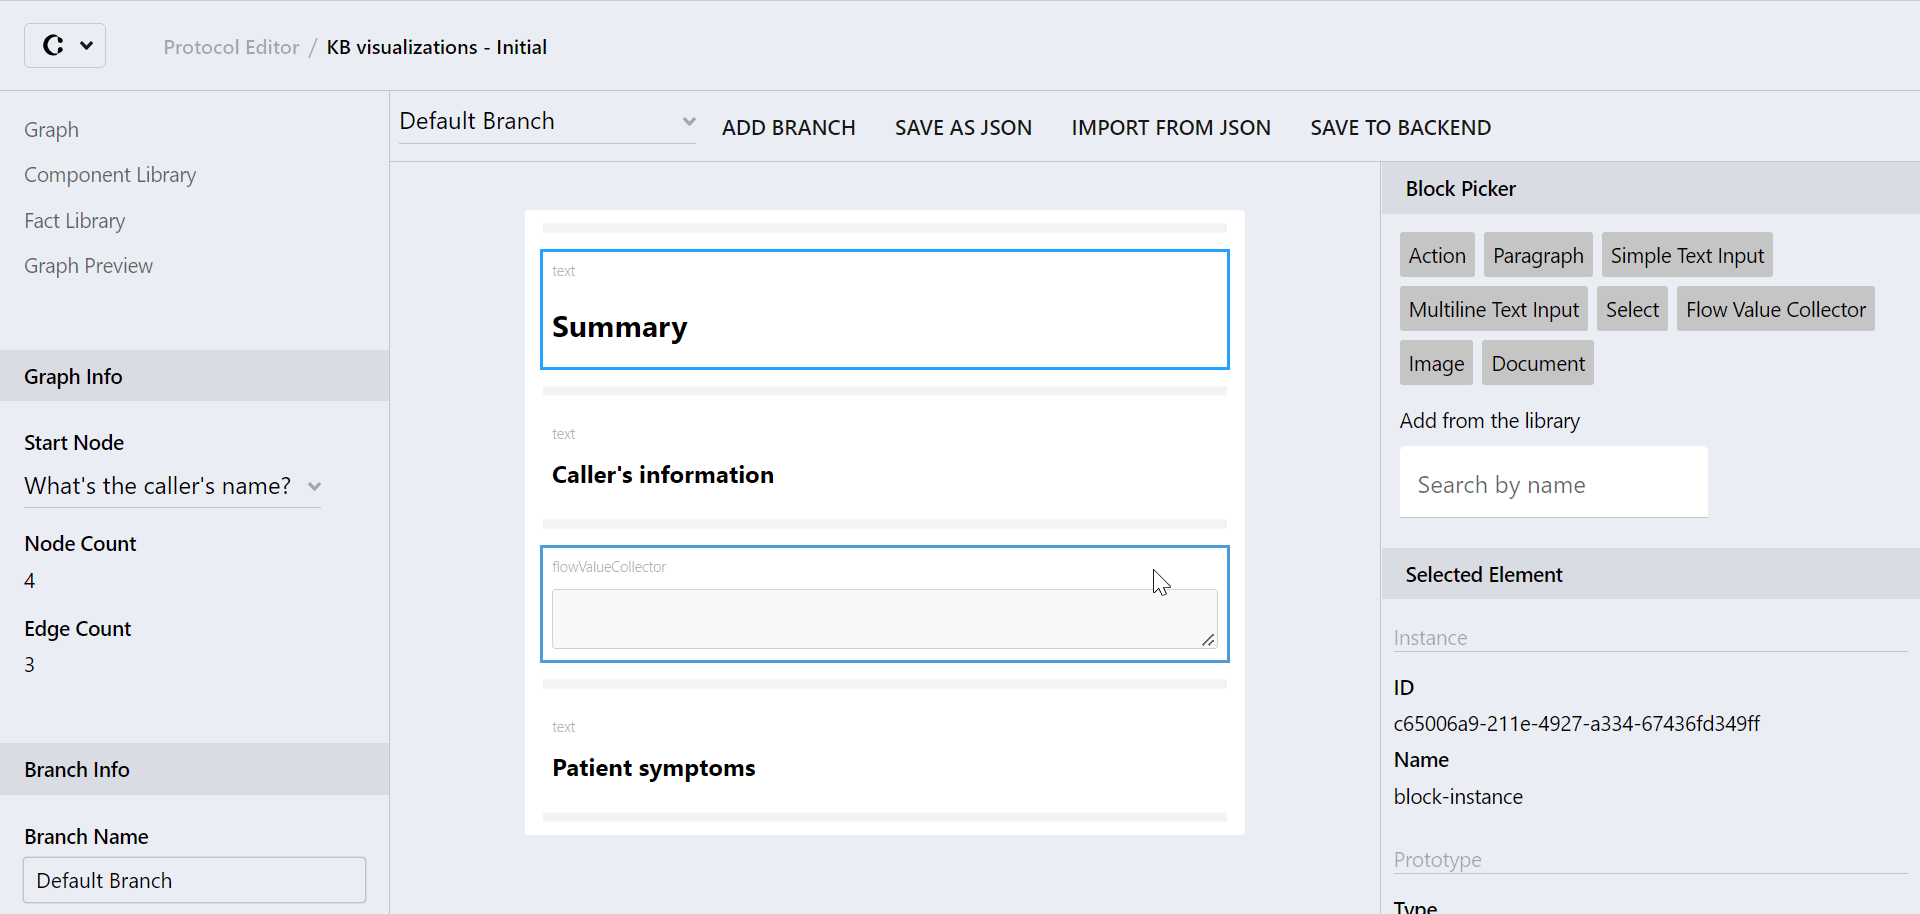
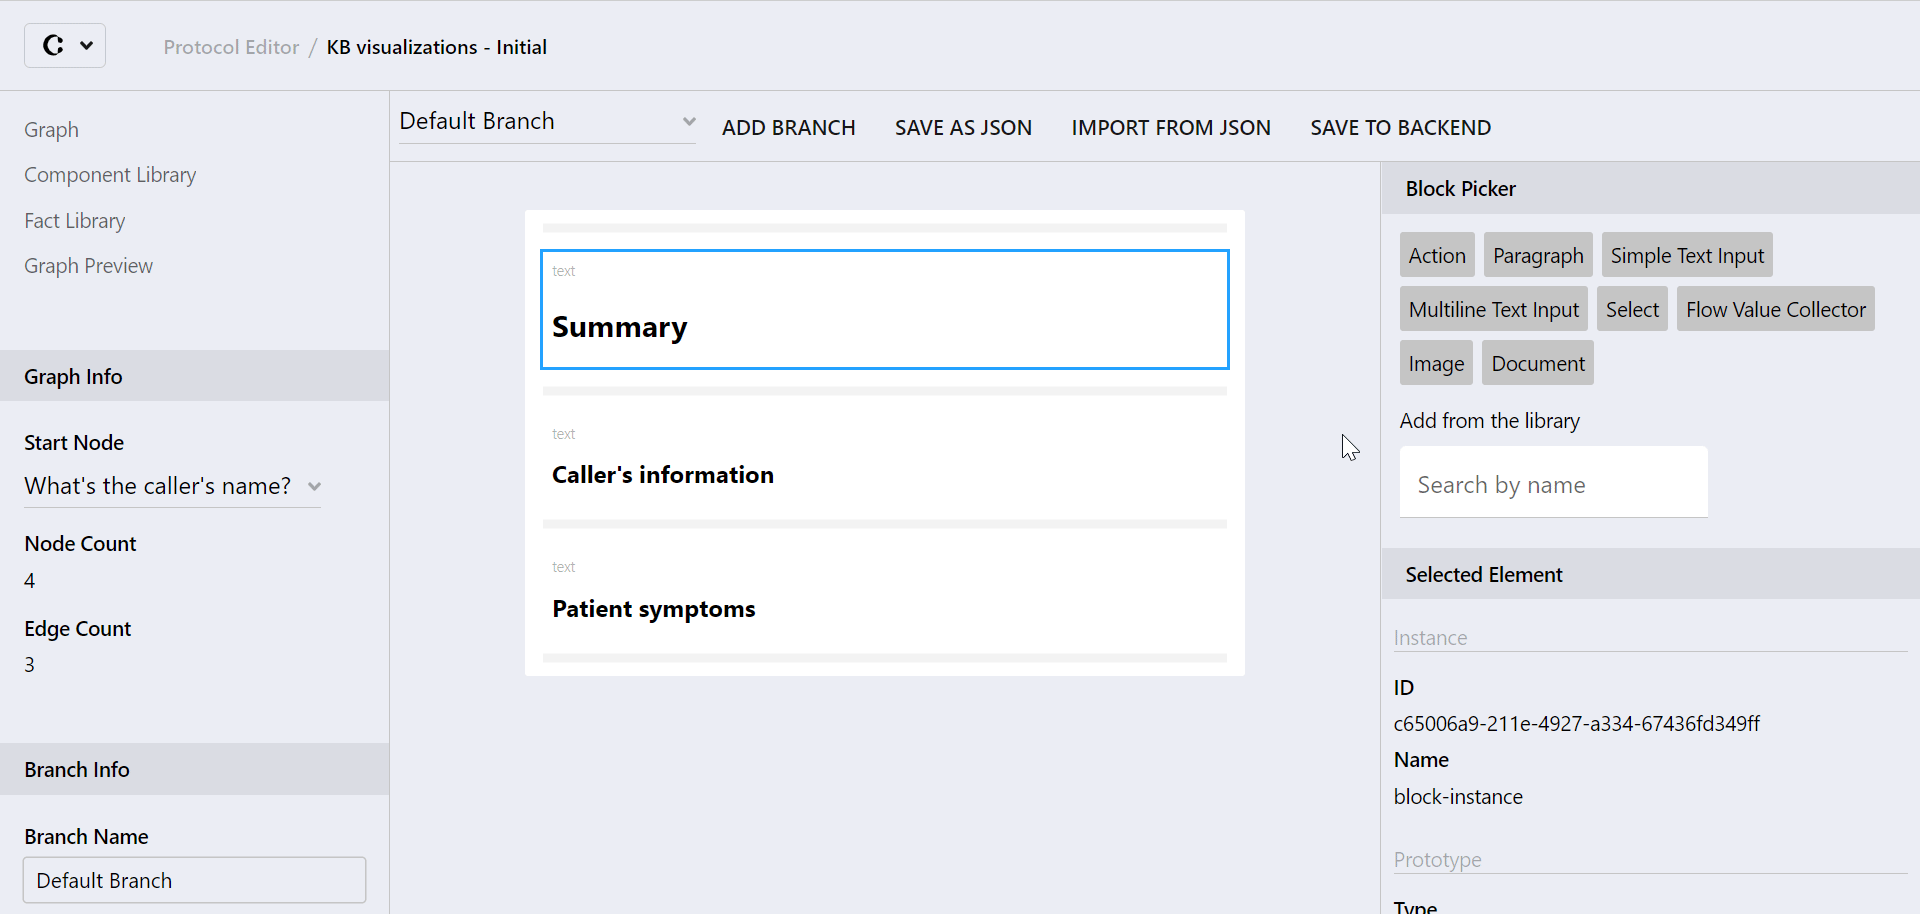 1. In your graph, identify a place where your collected input should be displayed in your protocol flow. Insert a Flow Value Collector content block where you would like at least one collected information to be displayed.
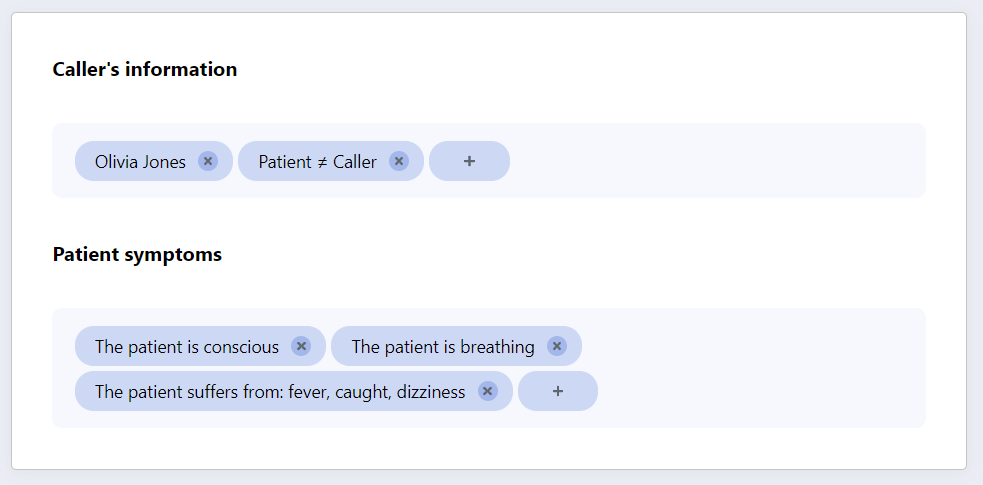
In the opposite video, we want the caller's information to be collected and displayed below its corresponding headline in the summary. A flow value collector content block is therefore added there.
💡 To insert a content block in a view node, click and drag the chosen block from the Right sidebar to the View Node Canvas.
When dragging a block, blue markers appear to indicate where the block can be dropped. The markers will become bolder when hovering over them, signaling the block can effectively be dropped there.
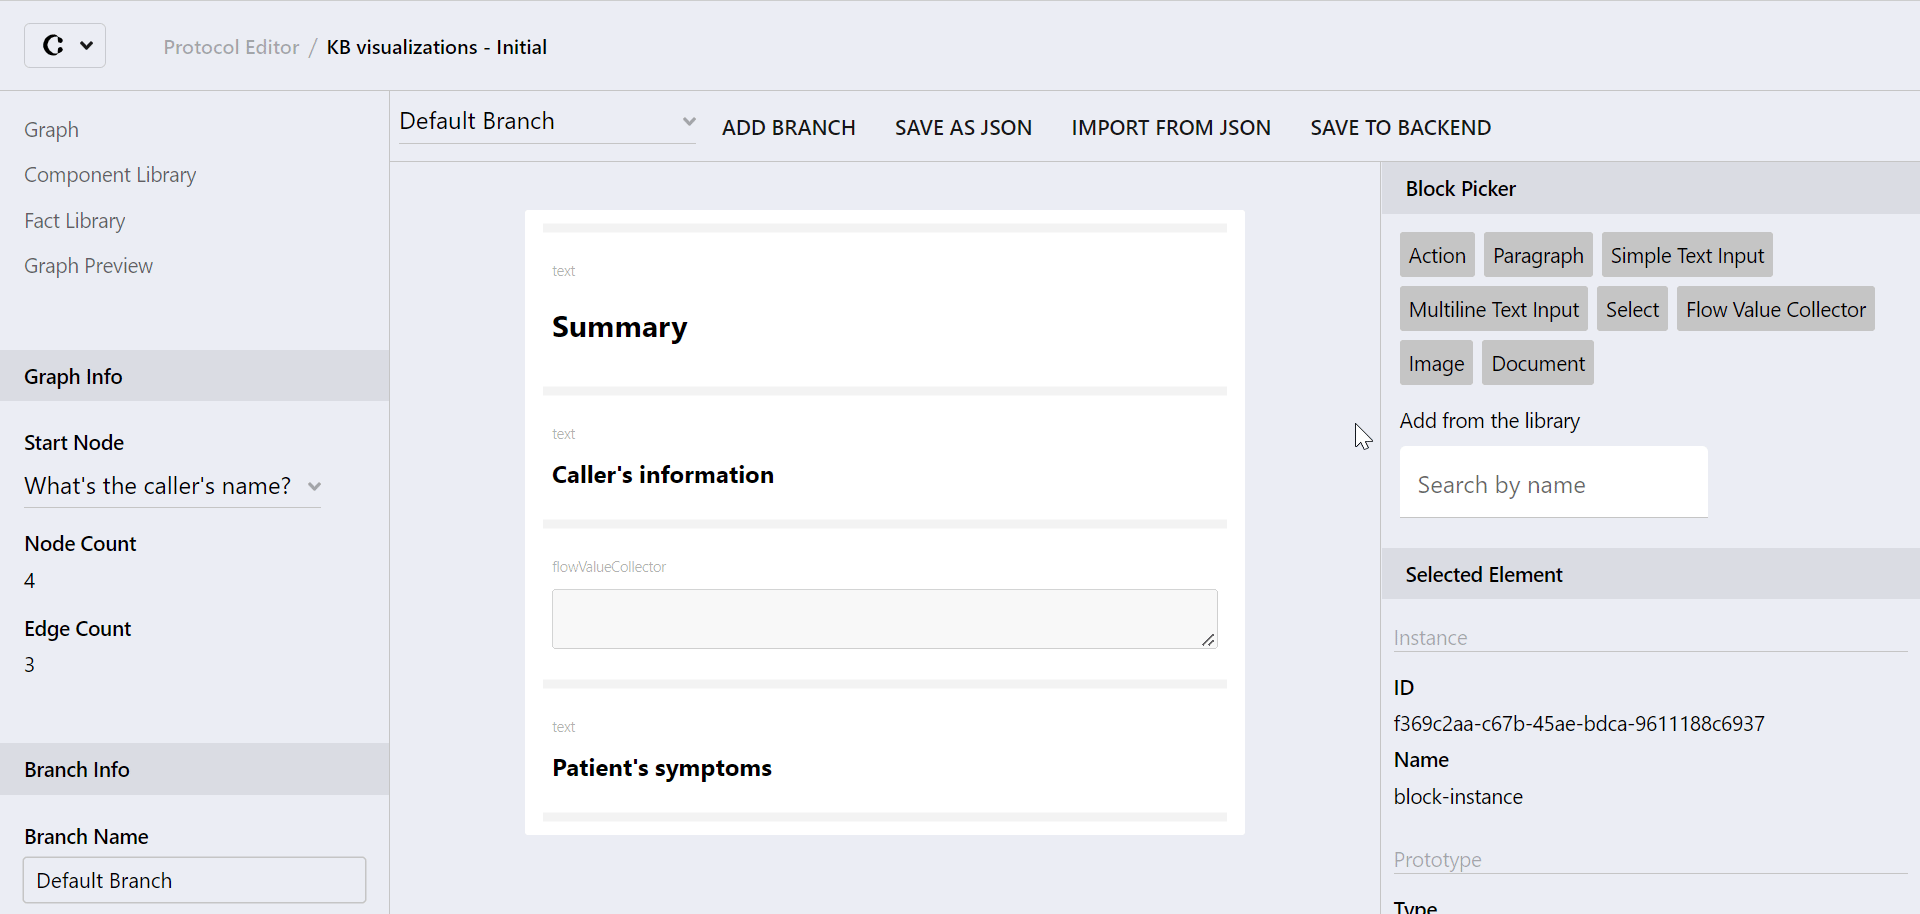
 2. For each Flow Value Collector you add to a view, select its block by clicking on it in the View Node Canvas. In the "Selected Element" section of the Right sidebar, click on the "name" field and write any name you would like to give to your flow value collector.
For instance, the name of the flow value collector which will gather the caller's information has been defined as: "caller"
💡 The Flow Value Collector's name is the information you need to refer to when you configure the input collection in Step 1, to indicate which flow value collector should display the input. We recommend you choose a name which makes it easy for you to identify each flow value collector.
 3. Congratulations: you have configured your flow value collector so all information configured to be displayed by this collector shall now be displayed in this exact location of your protocol flow. You can now repeat this process with other flow value collectors, if necessary.
In our example, we would for instance configure a second flow value collector to collect and display the patient's symptoms, to complete our summary.
Further Reading