Learn how to create custom keyword detections to power your Live Detection Alerts and/or Post-Call Annotations & Protocol Tags.
1. Introduction
Corti's AI Detections aim at complementing the human's expertise during patient consultations, thanks to a systematic keyword search and/or a deep-learning training method based on listening to millions of emergency calls.
AI Detections power several functionalities of the Corti platform:
- Detection Alerts
- Annotations
- Protocol tags
This article aims at guiding you through the creation process of a Custom Keyword Detection.
⚠️ Recall that Corti supports different types of detections. This HOW-TO applies to Custom Keyword Detections. Deep-Learning detections result from a different creation process which can only be completed by Corti.
If you would like to step-up your protocols using one of Corti's Deep Learning Detections, reach out to your assigned Corti representative.
⚠️ Completing the steps mentioned in this HOW-TO requires permissions to work in the Topic Management View, in the Organization Settings Module. Contact your administrator if you are in need of additional permissions.
2. Step-by-step guidance
To create a Custom Keyword Detection, follow the steps below:

- From the Corti Menu, go to the Organization Settings module
- In the left sidebar, go to the Topic Management page. You'll be redirected to a page where you can see all your existing keyword detections.
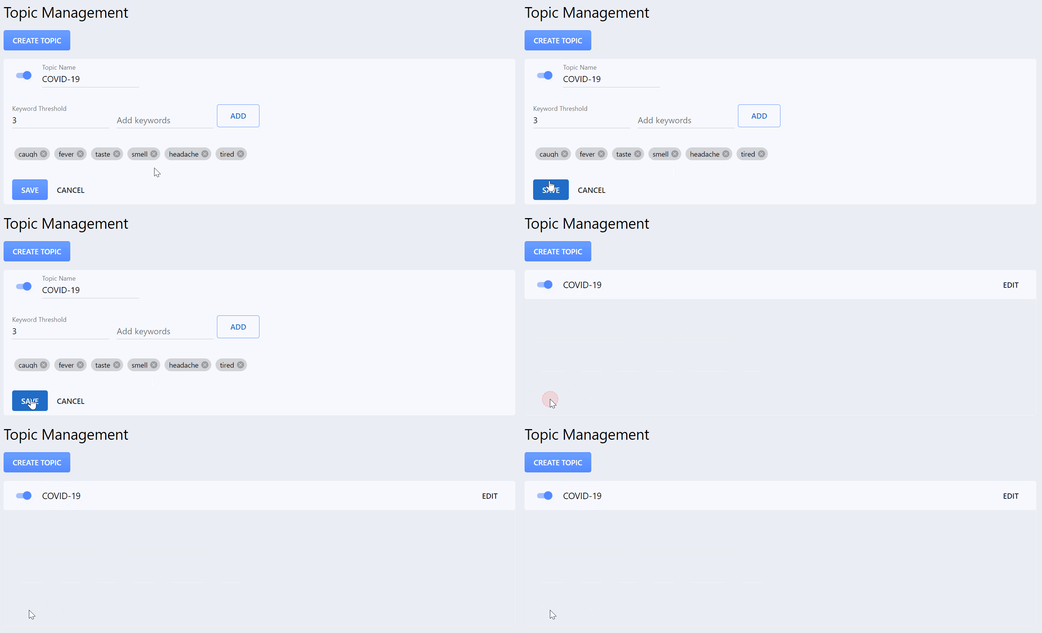
- Click on the "create topic" button which is at the top of the Topic Management page.
- Enter your detection parameters:
-

Topic Name field: to add a title to your keyword detection
- Keyword Threshold field: to specify the number of identified keywords you would like to reach to trigger the detection
- Add keyword field: to add keyword(s) which should affect your detection. Click on the "add" button after typing each keyword to validate them.
💡 When creating a new detection, make sure that the toggle switch next to its Topic Name is colored in blue. This means that the detection model is activated and detections will be generated. When it is is colored in grey, the model is deactivated and detections will not be generated.

5. Click on the "Save" button to save your detection parameters. Saved Keyword Detection collapse but remain visible in the Topic Management page. Congratulations: you've created a custom keyword detection.
💡 Following the steps of this HOW-TO is all you need to start getting custom detection tags in the Post-Call Analytics' Call List, for your upcoming calls.
If your end-goal is to create custom pop-up alerts for your call-takers, don't stop there! You have completed the first configuration step. Now, on to the next one...
3. Further Reading
How to customize the content of a detection alert or annotation
