Find out how to customize the call data displayed in the call list view
Table of Contents
1. Introduction
Within Explore, the content of the table in the Call List View can be customized so that users are presented with information that is most relevant to their organization and/or their user account specifically.
Amongst the customization options, users have the possibility to customize the table's content by adding, removing and reordering columns dedicated to specific data types. In addition, users can adjust the width of those columns. You will learn how in the sections below.
The customization of the table in Call List View relies on having permission to access Explore.
Additional permissions are required to set the customized column layout as organizational default. If you need additional permissions contact your administrator.
2. Step-by-Step Guidance
To customize columns, navigate to the Call List View in Explore:
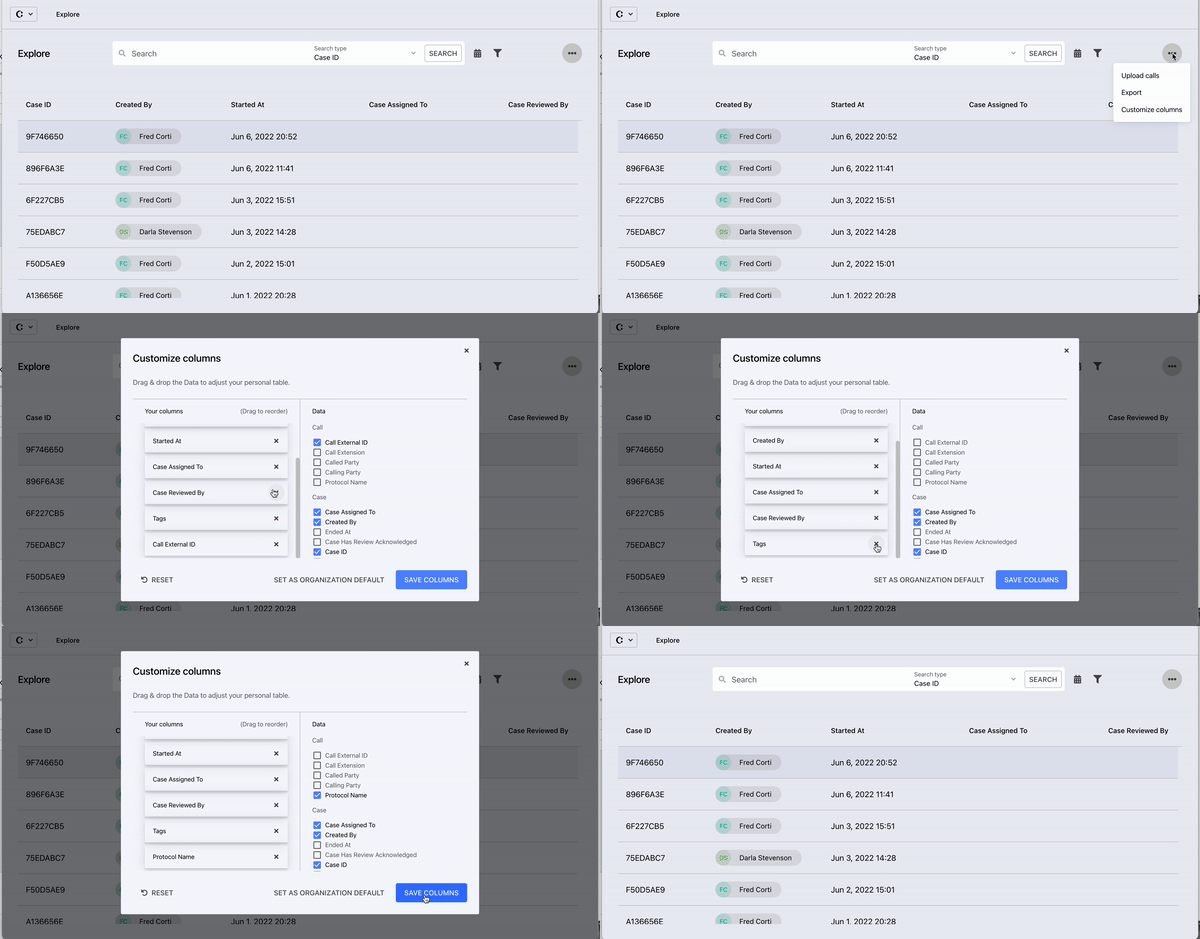
A. Select data fields
- Open the menu (...) in the top right-hand corner of the Call List View
- Select Customize columns and a pop-up window will open

- The left column in the pop-up lists the current data fields on display in the call list. Clicking x will remove the column
- The right side of the pop-up lists all of the data fields available. Checking or unchecking an option will add/remove it from the column display
- Click SAVE COLUMNS to save the changes
- Every user can set a personal layout according to their own needs, which will be saved for their user account
- For those who have admin privileges there is also the option to select SET AS ORGANIZATION DEFAULT which will set the chosen column layout as default for all users
- Clicking RESET will reset settings to the organization default
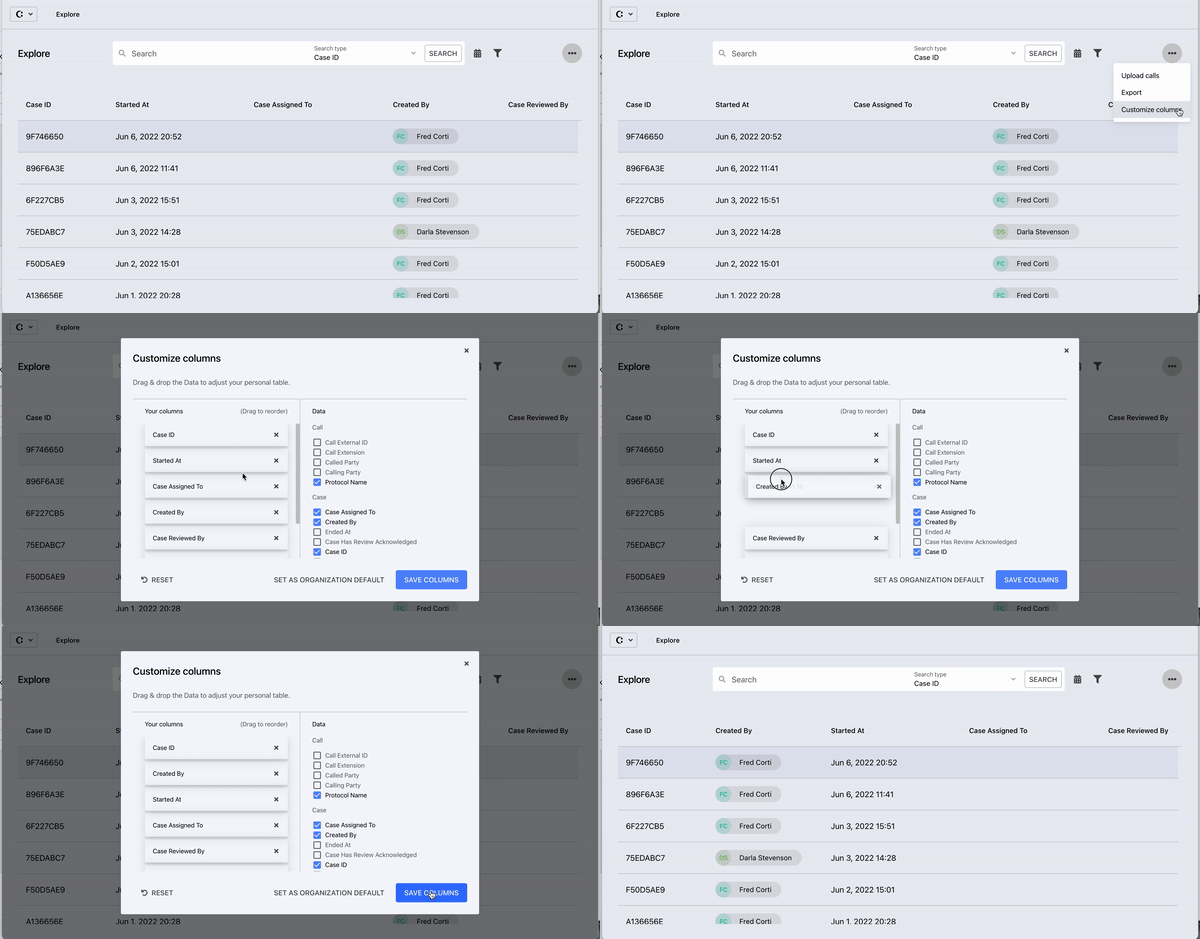
B. Change the order of the columns
- Open the menu (...) in the top right-hand corner of the Call List View

- Select Customize columns and a pop-up window will open
- The left column lists all in the data fields in their current order
- To change the position of a data field, click and hold to select, and move up or down to the desired location
- Click SAVE COLUMNS to save the changes
- Every user can set a personal layout according to their own needs, which will be saved for their user account
- For those who have admin privileges there is also the option to select SET AS ORGANIZATION DEFAULT which will set the chosen column layout as default for all users
- Clicking RESET will reset settings to the organization default
C. Edit column width
- In the main view of the Call List View, hover your cursor at the edge of the columns in the top (title) row
- When the blue line appears, click and hold to drag the column to the desired width

3. Further Reading
How to export the Call List output
How to apply new filters to your call list in the Call List View
How to apply saved filters to your call list in the Call List View
How to turn on notifications for high-priority calls
How to save filters in the Call List View
